Starting a Hytale server on CloudNord is simple, but it includes an important authentication step that must be completed before the server can fully run.
This guide walks you through the entire startup process, exactly as shown in the screenshots.
Step 1: Start the Server
-
Log in to your CloudNord Control Panel
-
Select your Hytale server
-
Click the Start button
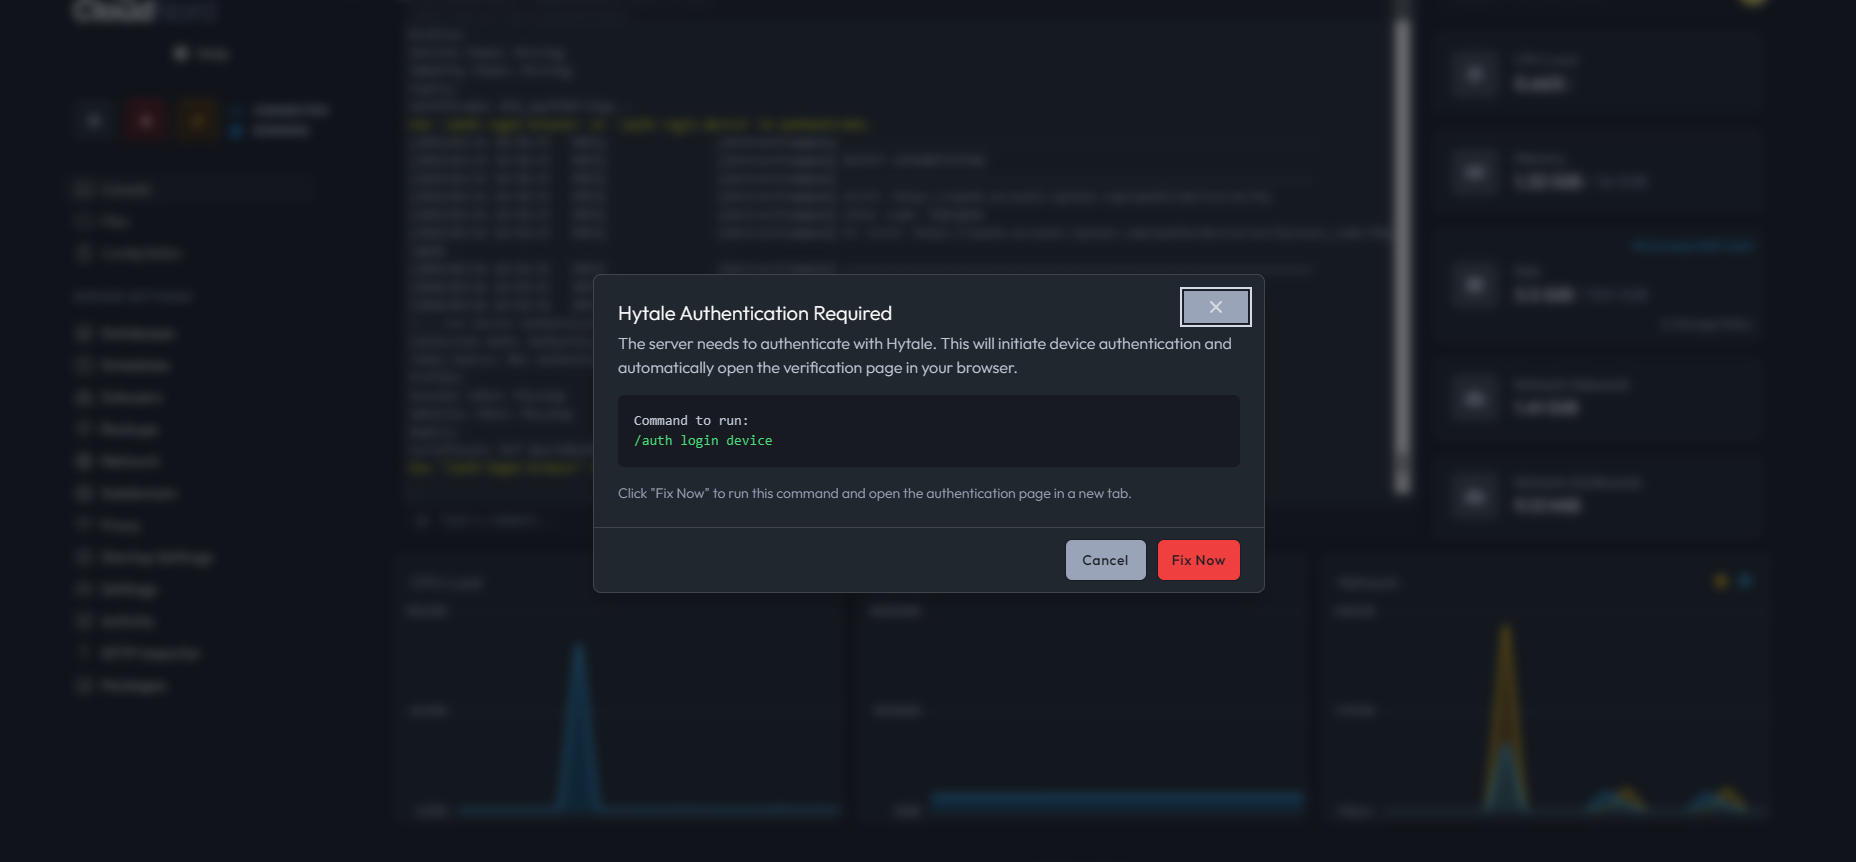
Step 2: Hytale Authentication Required
Console Authorization Code (Important)
When you run the authentication command:
The server console will display an authorization URL and a unique code.
You will see output similar to this in the console:
How to Use the Code
-
Open the authentication URL shown in the console
-
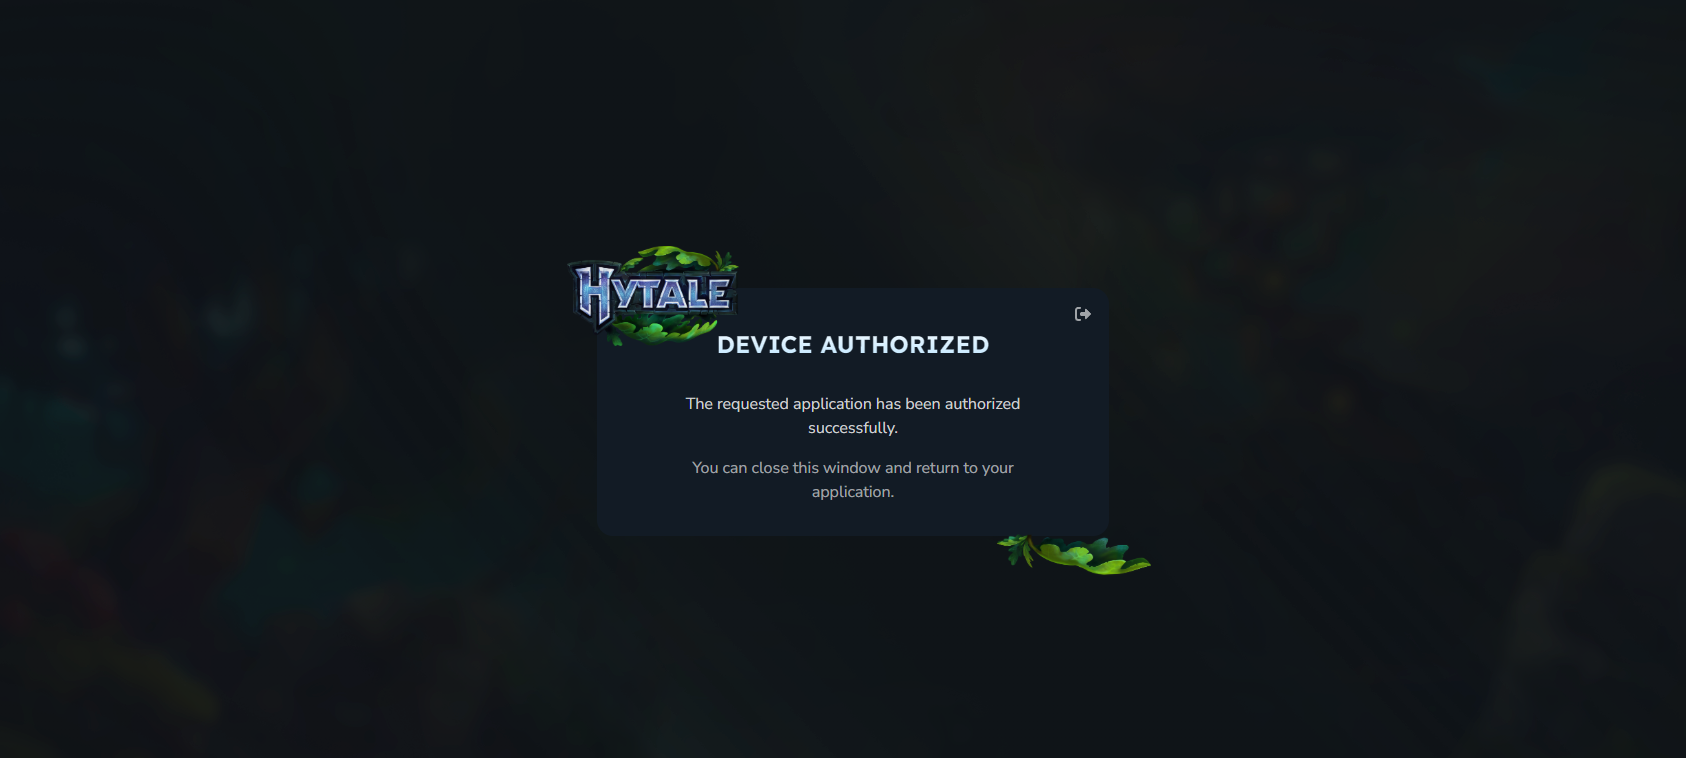
You will see an “Authorize Device” page
-
Enter the code exactly as shown in the console
-
Example:
NPVsWbJR
-
-
Click Continue

If successful, the page will show: “Device Authorized”
Hytale Authentication Required
This means the server must authenticate with Hytale before it can continue.
You will see a prompt like:
/auth login device
You can either:
-
Run the command manually in the Console
-
Or click “Fix Now”, which runs the command automatically
Step 3: Authorize the Device (Browser Step)
After running the authentication command:
-
A new browser tab will open automatically
-
You will be redirected to the Hytale device authorization page

-
Click Approve
If successful, you will see: “Device Authorized”
You can now close the browser tab and return to the control panel.
Step 4: Confirm Authentication Success
Back in the Console, you should see messages like:
-
Authentication successful -
Credentials saved using encrypted storage -
Connection Auth: Authenticated
To verify manually, run:
/auth status
If the status shows Authenticated, the server is fully authorized.
Step 5: Server Is Now Running
Once authentication is complete:
-
The server status will change to Running
-
CPU and memory usage will begin updating
-
The server is now ready for players
Common Notes & Tips
-
Authentication is required only once, unless credentials expire
-
Do not close the server during device authorization
-
If authentication expires, simply repeat
/auth login device
Need More Help?
If you can't find what you're looking for, our support team is here to help.![]()