CloudNord makes it straightforward for server administrators to manage Minecraft Bedrock servers, including updating or downgrading the game version. Follow this guide for a safe, reliable process.
Why Change the Server Version?
Server version management is crucial for:
-
Ensuring compatibility with plugins and mods.
-
Letting players use specific features or mechanics found in older versions.
-
Helping communities that prefer not to update right away due to major gameplay changes.
Step 1: Login and Access Your Server
Begin by logging into your CloudNord dashboard. From the main panel, select your Minecraft Bedrock server instance listed under “Servers.” The screenshots show the navigation menu on the left side.
Step 2: Go to Startup Settings
In the sidebar, find and click Startup Settings (shown highlighted in the screenshots). This section controls server startup parameters, including the Bedrock version and additional launch options.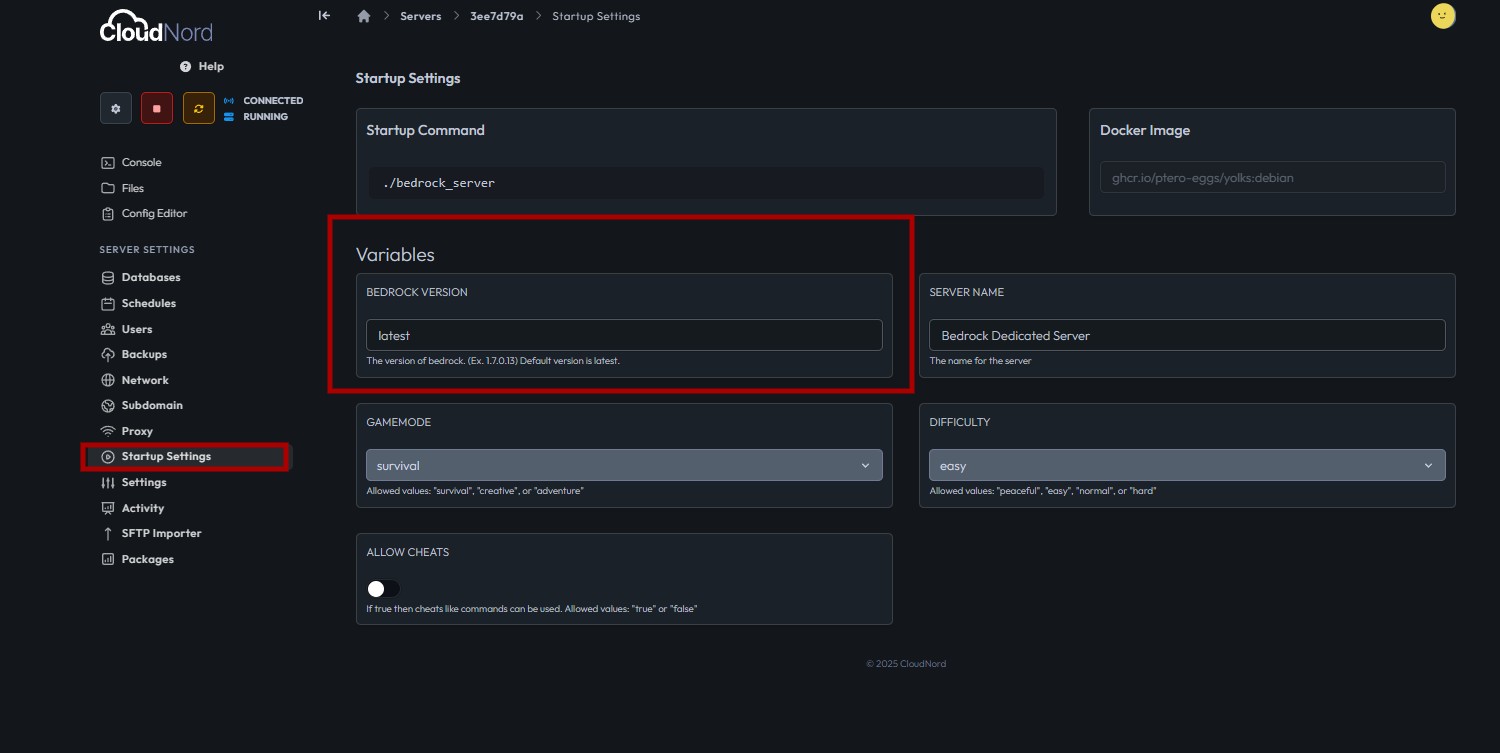
Step 3: Locate the Bedrock Version Field
Within Startup Settings, look for a box labeled BEDROCK VERSION:
-
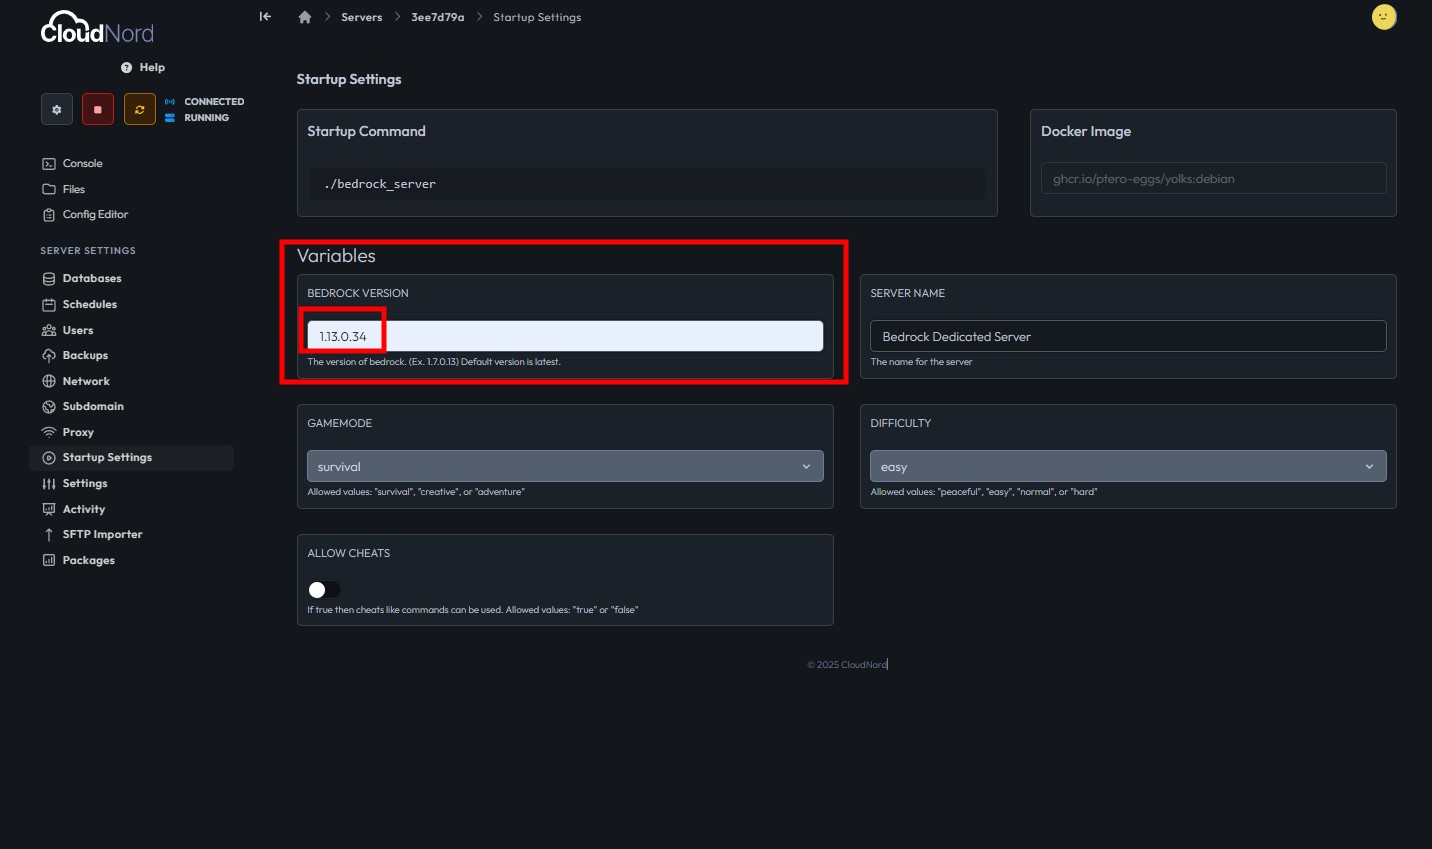
If set to
latest, the server will automatically use the most recent version available when restarted. -
To specify an older or custom version, enter that version precisely (for example,
1.13.0.34).
CloudNord allows this field to be edited directly. Beneath the box, supported version formats are explained (typically X.Y.Z, e.g., 1.17.0.13).
Step 4: Change the Version
-
Click inside the BEDROCK VERSION box and type the desired version number if you want something other than the default ‘latest’.
-
Make sure the version is valid—refer to Minecraft Bedrock official releases for correct numbers.
Step 5: Review Other Variables (Optional)
While changing the version, review related settings:
-
Server Name: Change as needed for your community identity.
-
Gamemode: Set to
survival,creative, oradventurebased on preferences. -
Difficulty: Choose among
peaceful,easy,normal, orhard. -
Allow Cheats: Enable or disable command cheats depending on your server rules.
All these fields are shown for maximum customization; changes are usually saved after the field is edited.
Step 5: Reinstall the Server from the Settings Tab
-
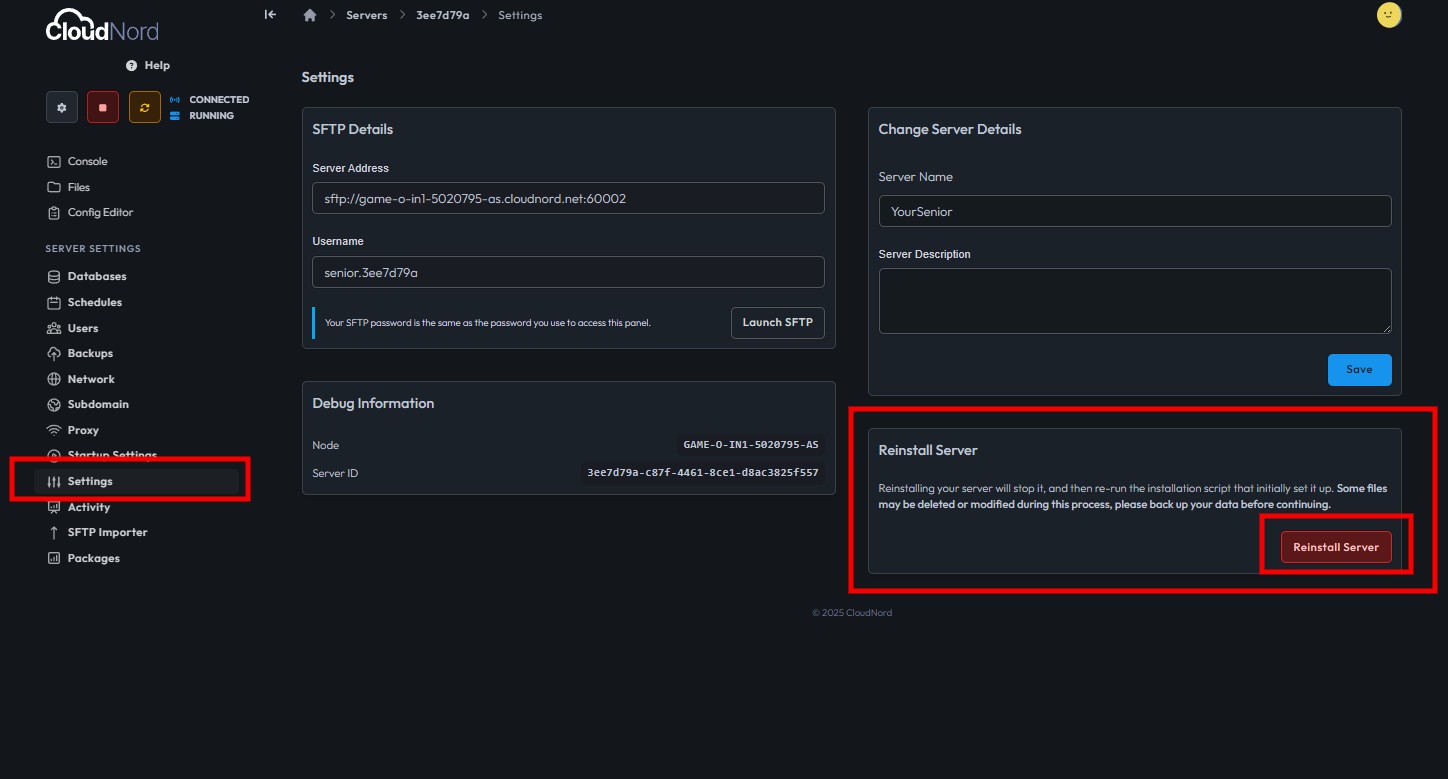
Go to the Settings tab in the left sidebar of your CloudNord panel.
-
In the Settings section, look for the Reinstall Server box on the right side.
-
Click the Reinstall Server button.
-
This action will stop your server and automatically download and install the exact version you specified in the BEDROCK VERSION field.
-
A warning will appear — some files may be deleted or overwritten during reinstallation, so always back up any important data before proceeding.
-
This step ensures the Bedrock server files match the version you entered, rather than just switching versions on an already-installed base. It’s crucial when downgrading or making major version changes, as it prevents version conflicts and corrupted files.
Step 7: Confirm the Version
After restart:
-
Go to Console in the menu to watch boot-up logs.
-
Look for lines that state the Bedrock version in use (e.g., “Starting Server – Version: 1.21.102.1”) and check for errors.
-
Using the correct version will show in these logs; mismatches usually result in startup failure.
Step 8: Troubleshooting Tips
-
If the server doesn’t start after a version change, double-check the entered version format.
-
Errors in the console may also indicate incompatibility with plugins or data files.
-
Some worlds may break on major downgrades/upgrades; consider starting fresh with significant version jumps.
Need More Help?
If you can't find what you're looking for, our support team is here to help.![]()