Whitelisting your Minecraft server ensures that only approved players can join and play.
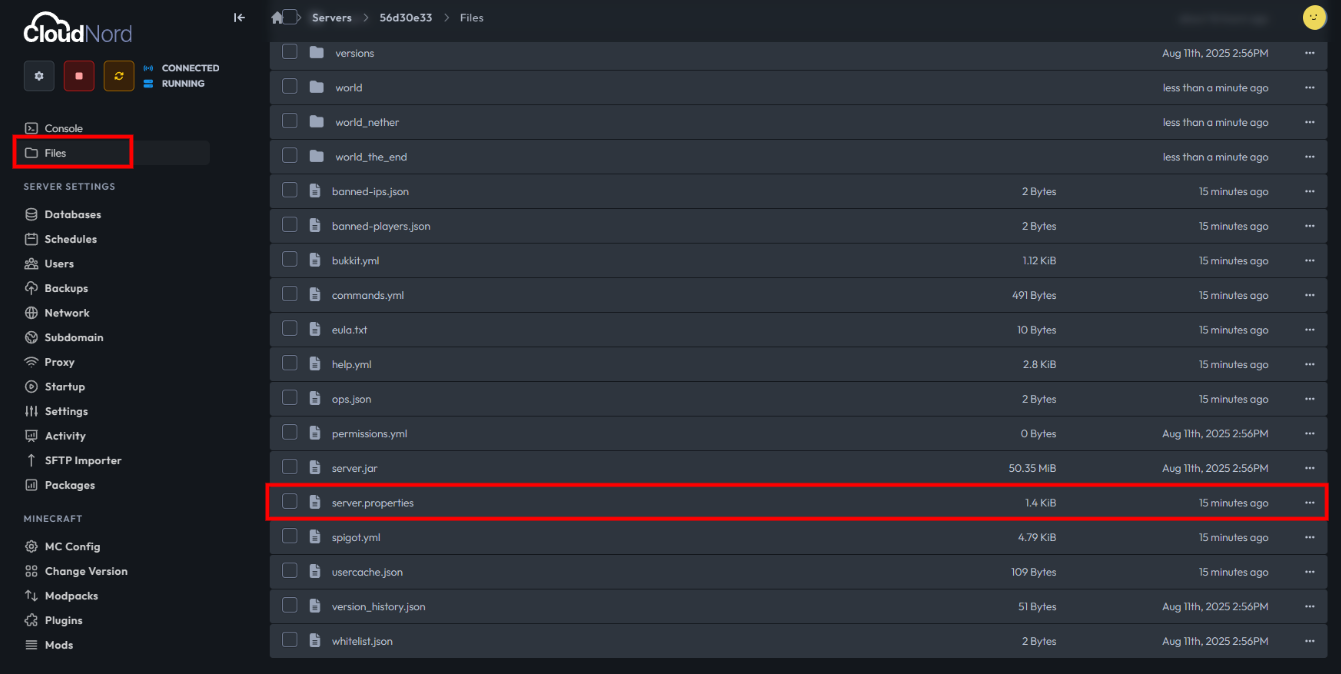
1. Access Your Server Files
-
Log in to your CloudNord dashboard.
-
Go to the Servers section from the Inventory menu to select your Minecraft server.
-
Once inside your server’s management panel, click on Files in the sidebar to view all your server files.
2. Enable Whitelist in server.properties
-
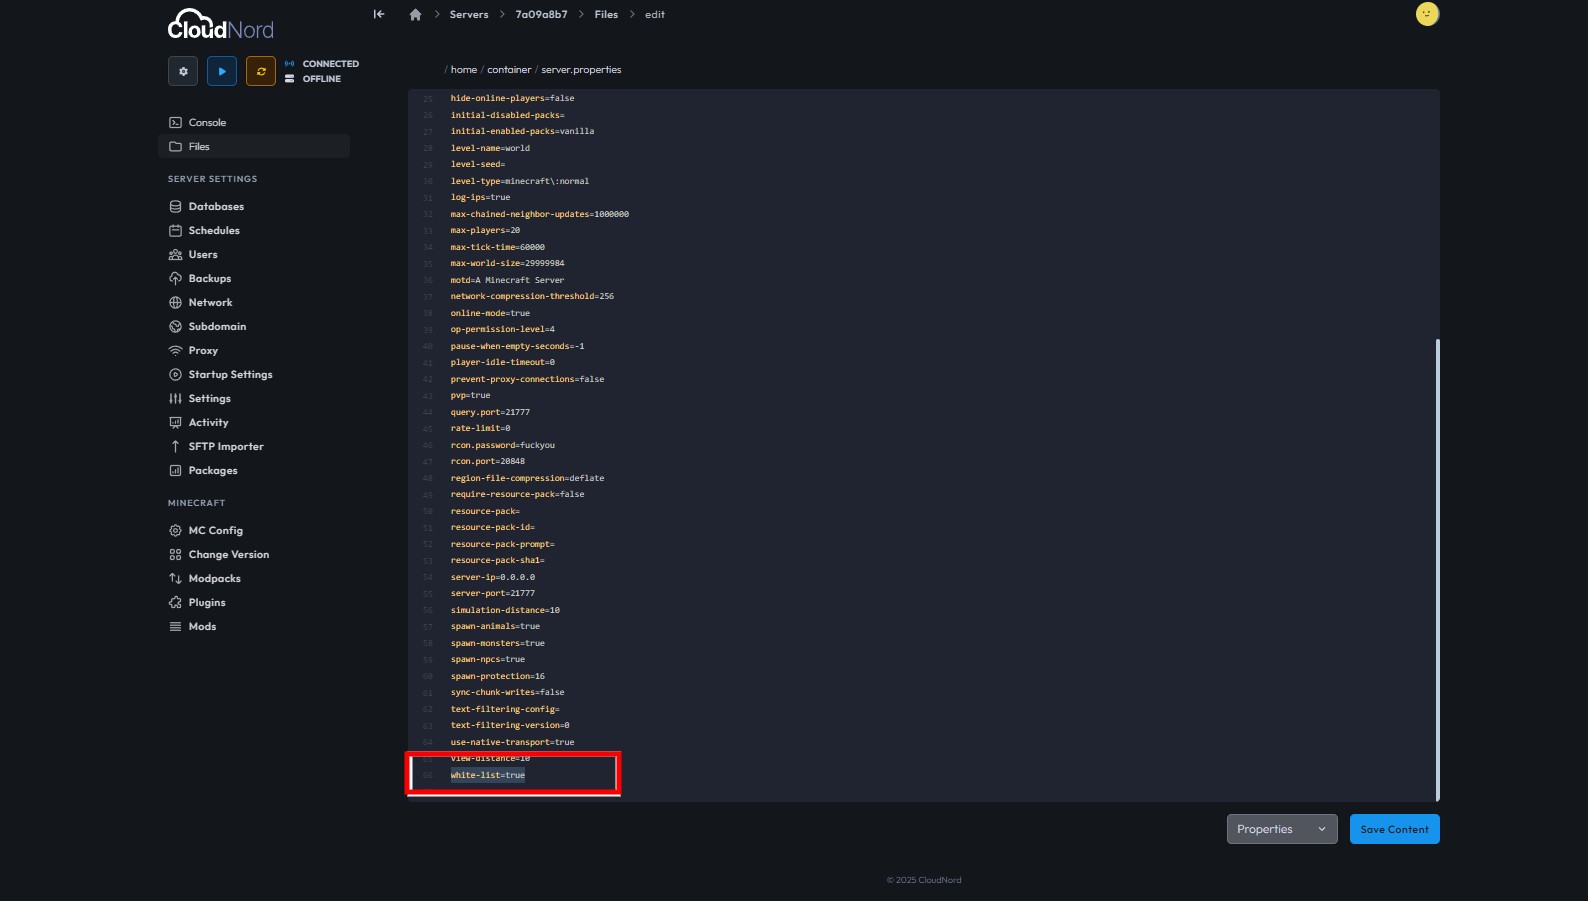
Find and select the
server.propertiesfile from your server files list. -
Scroll to locate the line:
white-list=false -
Change it to:
white-list=true -
This enables the whitelist feature, meaning only specified players can join your server.
-
Don’t forget to click Save Content after editing.
3. Add Players to the Whitelist
-
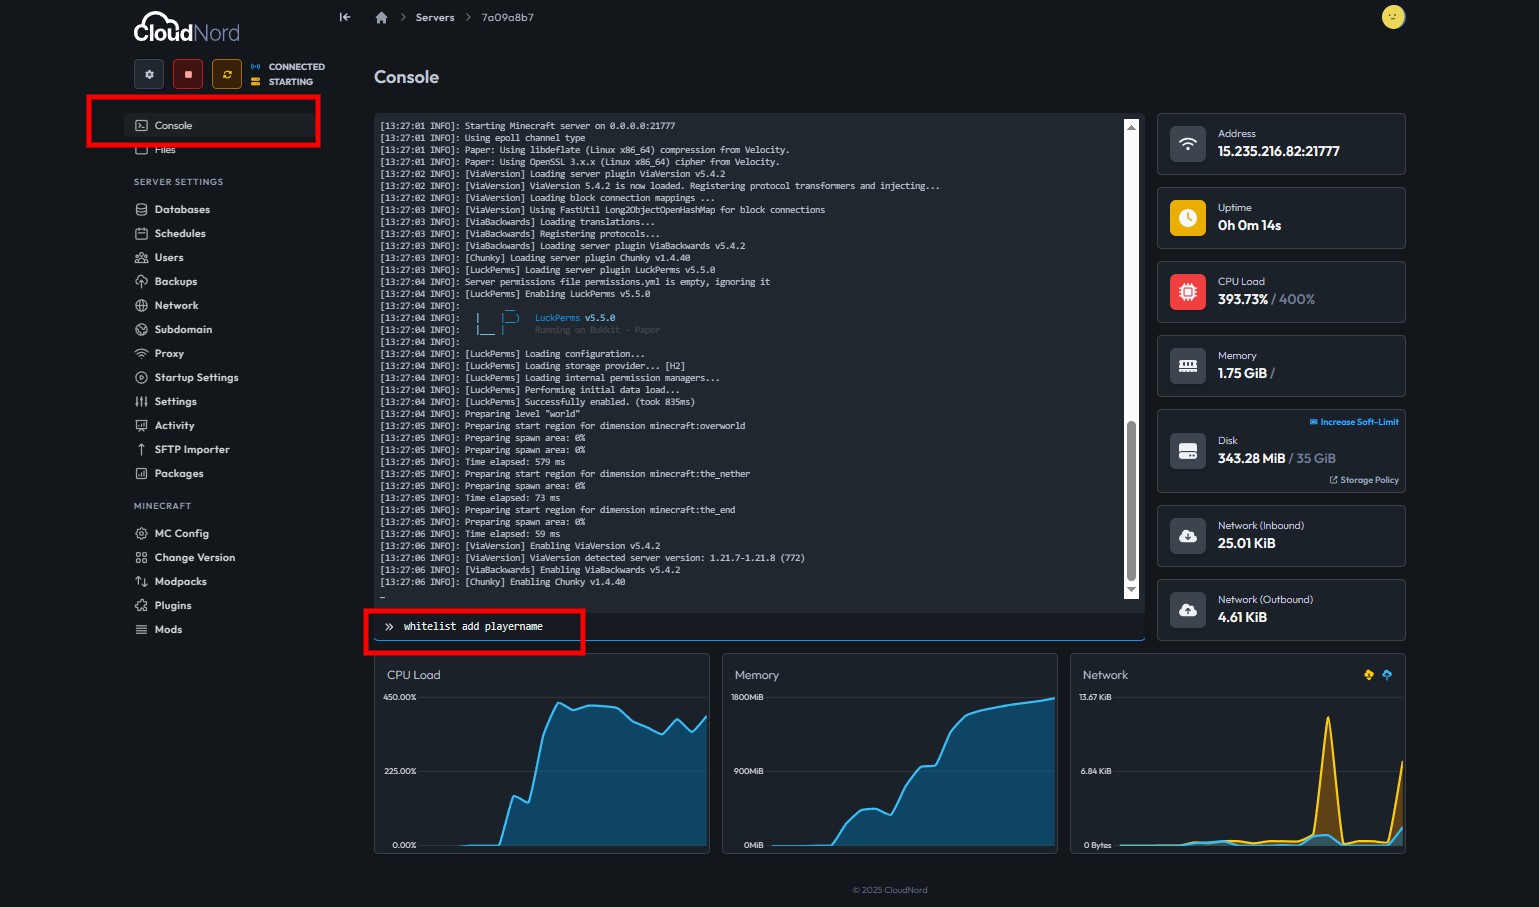
With whitelist now enabled, you’ll need to add player usernames to the whitelist.
-
You can do this either through:
-
The CloudNord console with the command:
whitelist add playername(Replace
playernamewith your friend’s Minecraft username.) -
Or by editing the
whitelist.jsonfile directly and adding player usernames.
-
4. Restart Your Server
-
For changes to take effect, restart your Minecraft server from the CloudNord control panel.
Summary
To whitelist your CloudNord server:
-
Edit
server.propertiesand setwhite-list=true. -
Add desired player usernames via console or the
whitelist.jsonfile. -
Save all changes and restart your server.
Now, only approved players will be able to connect, keeping your Minecraft world private and secure!
Need More Help?
If you can't find what you're looking for, our support team is here to help.![]()