Backing up your Minecraft server on CloudNord is essential for safeguarding your world and player data. Follow this simple guide to create, name, and manage server backups using the provided visuals.
1. Access Your Server Panel
-
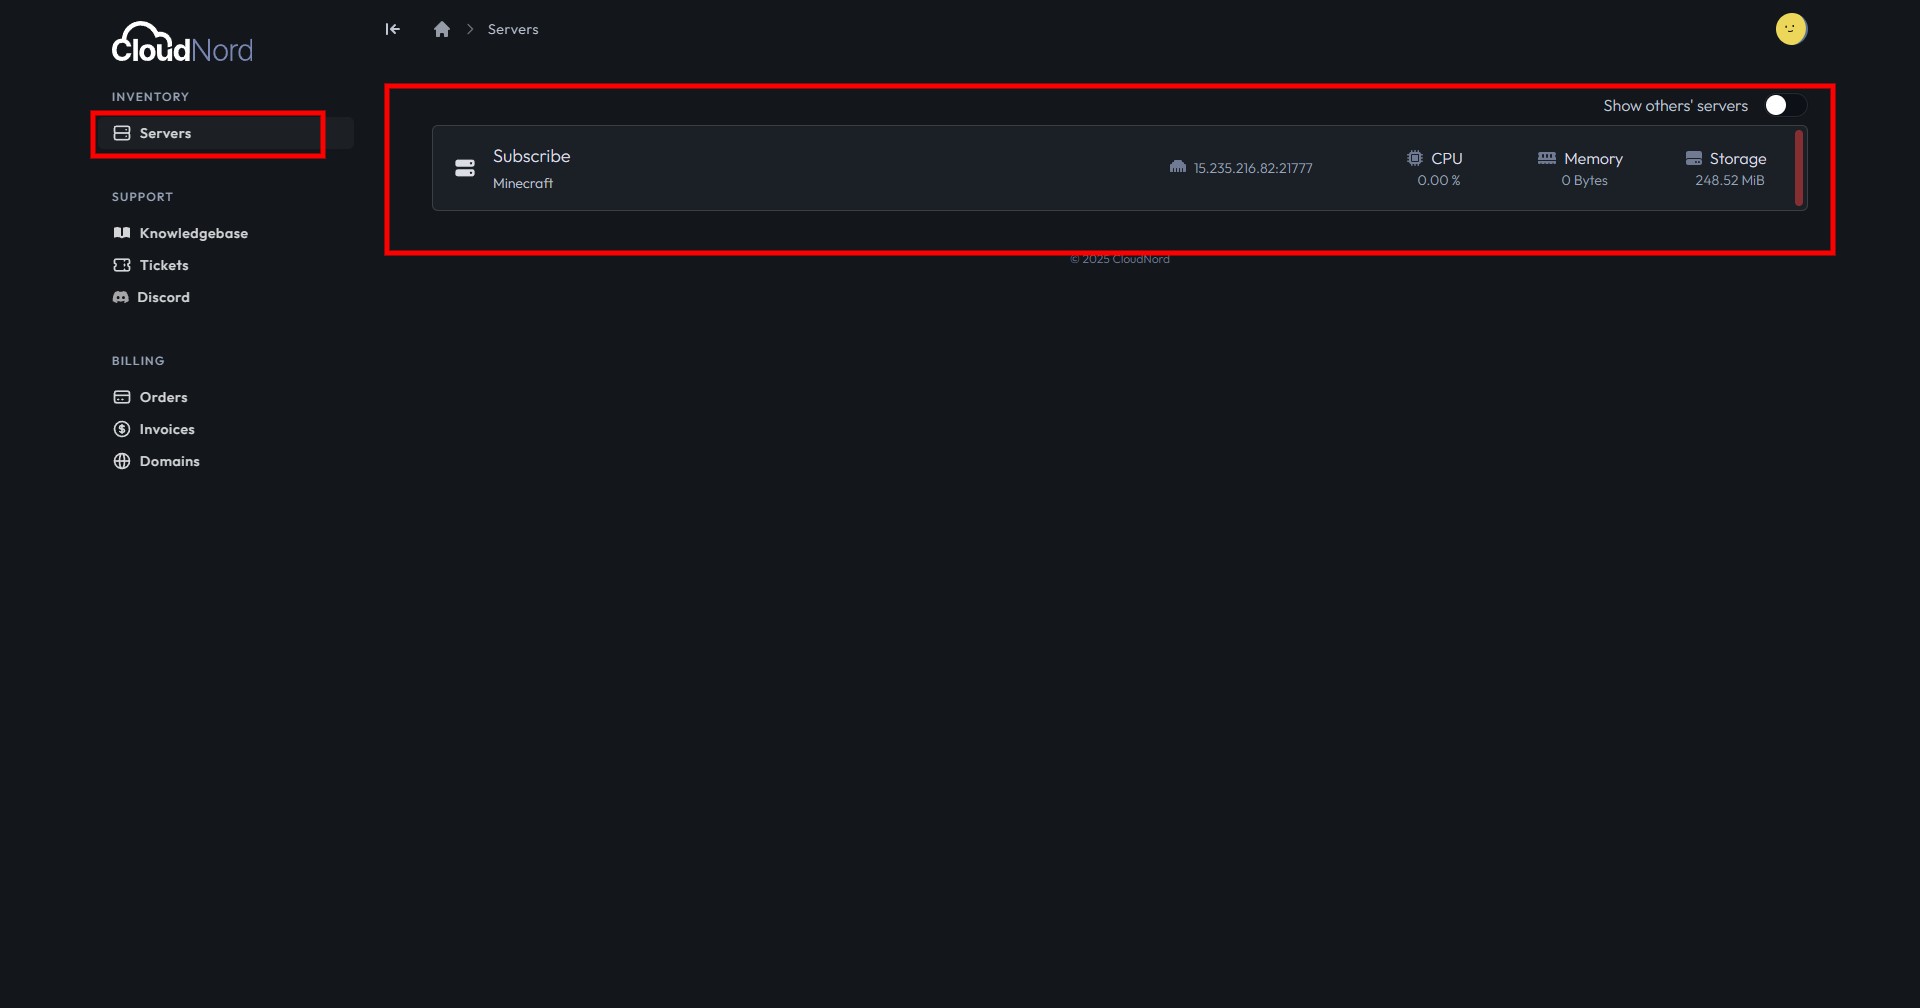
Log in to your CloudNord dashboard.
-
Click Servers in the left inventory menu.
-
Select the Minecraft server for which you want to create a backup.
2. Open the Backups Section
-
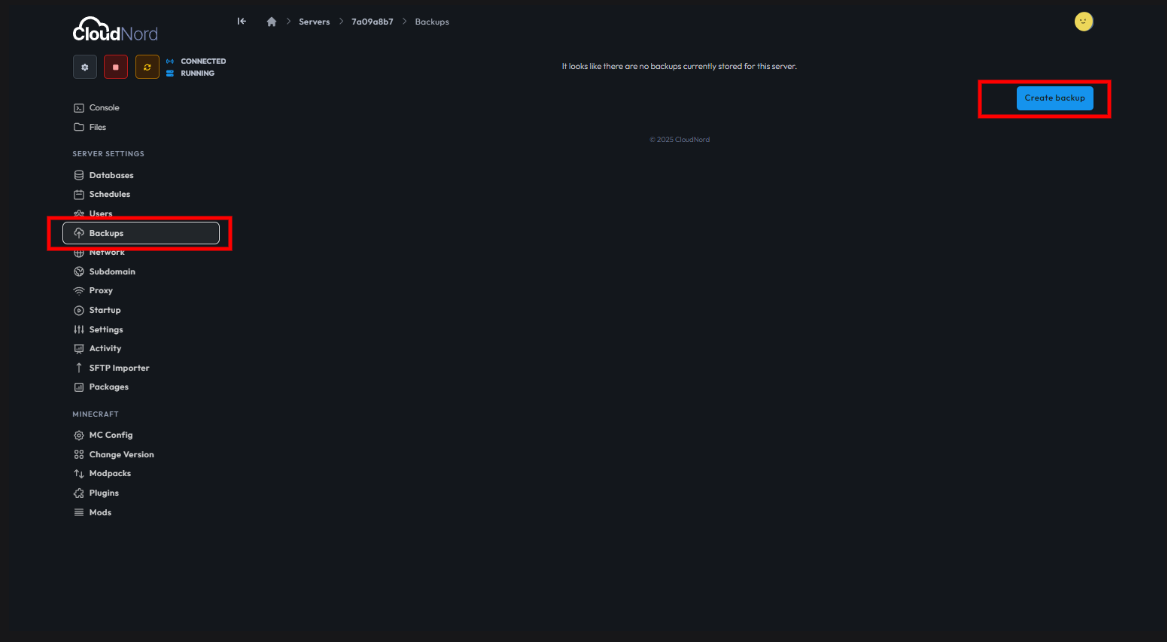
In the left sidebar under choose Backups.
-
You'll be taken to a page showing your current backups (if any). If there are no backups, you'll see a message indicating that.
3. Create a New Backup
-
Click the Create backup button on the right side of the Backups page.
-
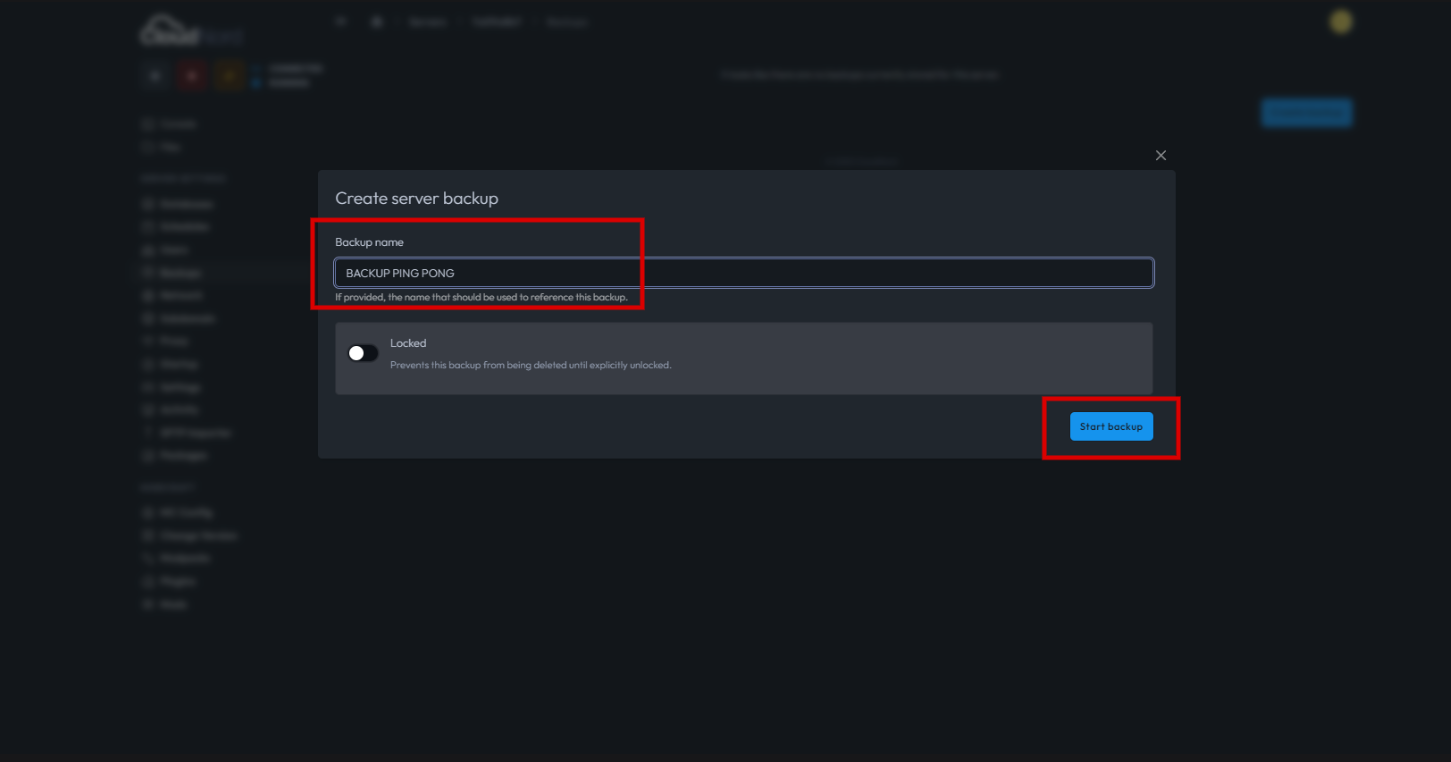
A popup will appear asking you to enter a backup name. Type a descriptive name for your backup (e.g., "BACKUP PING PONG").
-
Decide whether to lock the backup or not. Locking prevents accidental deletion until you unlock it.
-
Click Start backup to begin the creation process.
4. Manage and Download Your Backups
-
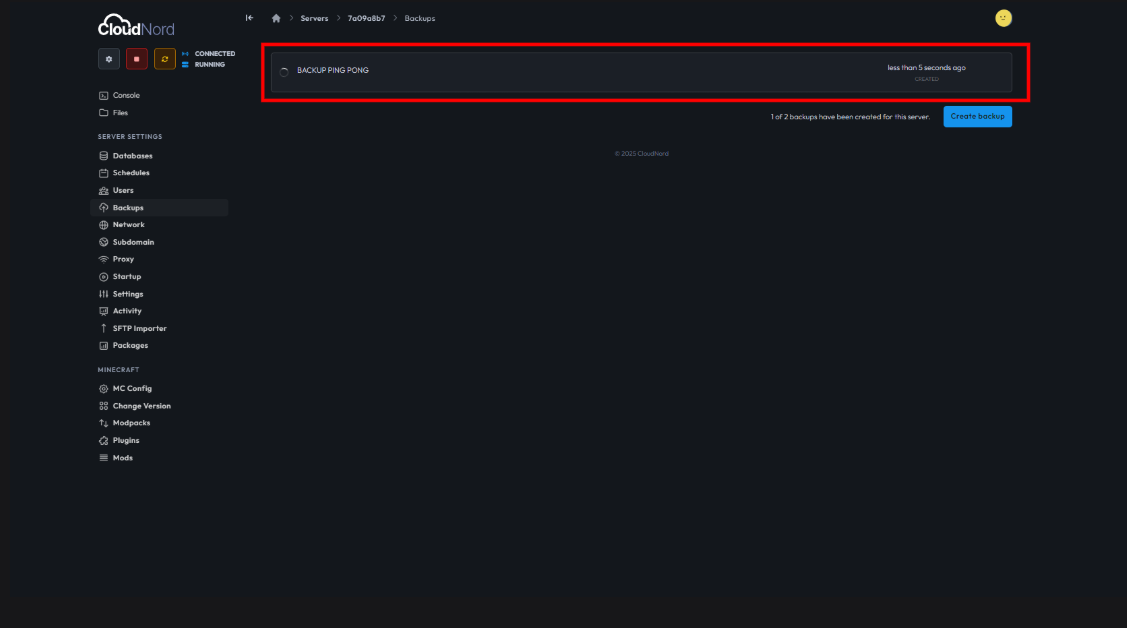
After your backup is created, you'll see it listed on the Backups page .
-
Click the three dots (menu) next to your backup—options will appear:
-
Download: Save the backup to your computer.
-
Restore: Use the backup to revert your server to that point.
-
Lock: Prevent deletion until unlocked.
-
Delete: Permanently remove the backup if no longer needed.
-

Tips for Managing Your Minecraft Server Backups
-
Name backups clearly for easy identification.
-
Lock important backups to protect them.
-
Restore from backups if you encounter data loss or want to revert changes.
Need More Help?
If you can't find what you're looking for, our support team is here to help.![]()