Enhance your Minecraft experience by uploading a custom resource pack to your CloudNord server. Resource packs can include custom textures, sounds, and other assets to make your game unique. Follow this guide to upload and configure a resource pack seamlessly.
Step 1: Prepare Your Resource Pack
-
Download or Create the Resource Pack
-
Ensure the resource pack is in
.zipformat. -
Verify that it is compatible with your Minecraft server version.
-
-
Host the Resource Pack Online
-
Use a reliable hosting service such as McPacks, or Dropbox, Google Drive, or a dedicated file hosting provider.
-
Make sure the download link is directly accessible. Some services may require modifying the link for direct downloads.
-
Step 2: Obtain a Direct Download Link
-
Upload the Resource Pack
-
Upload your
.zipfile to your chosen hosting platform.
-
-
Get the Direct Link
-
For Dropbox: Replace
www.dropbox.comwithdl.dropboxusercontent.com. -
For Google Drive: Use a link generator to convert the share link into a direct download link.
-
Test the link in a browser to ensure it works correctly.
-
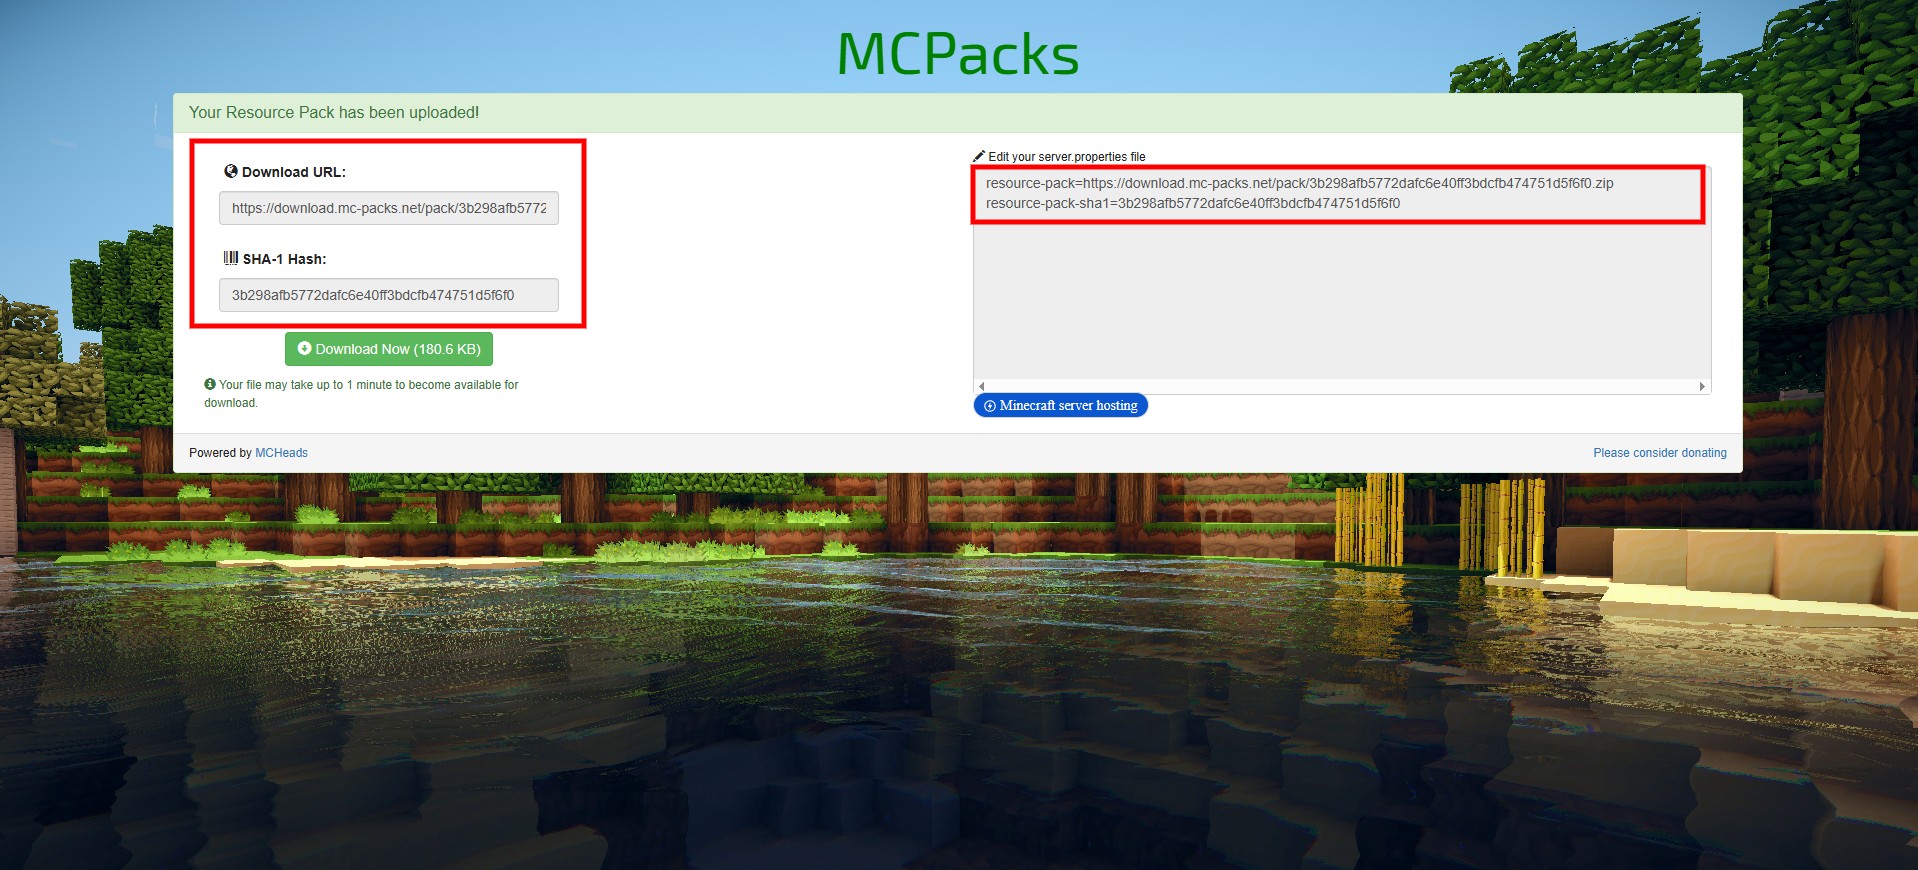
- If had uploaded your file to MCpacks : you will see a Download URL and SHA-1 Hash for your file, as shown in the screenshot.
Step 3: Configure Your CloudNord Server
-
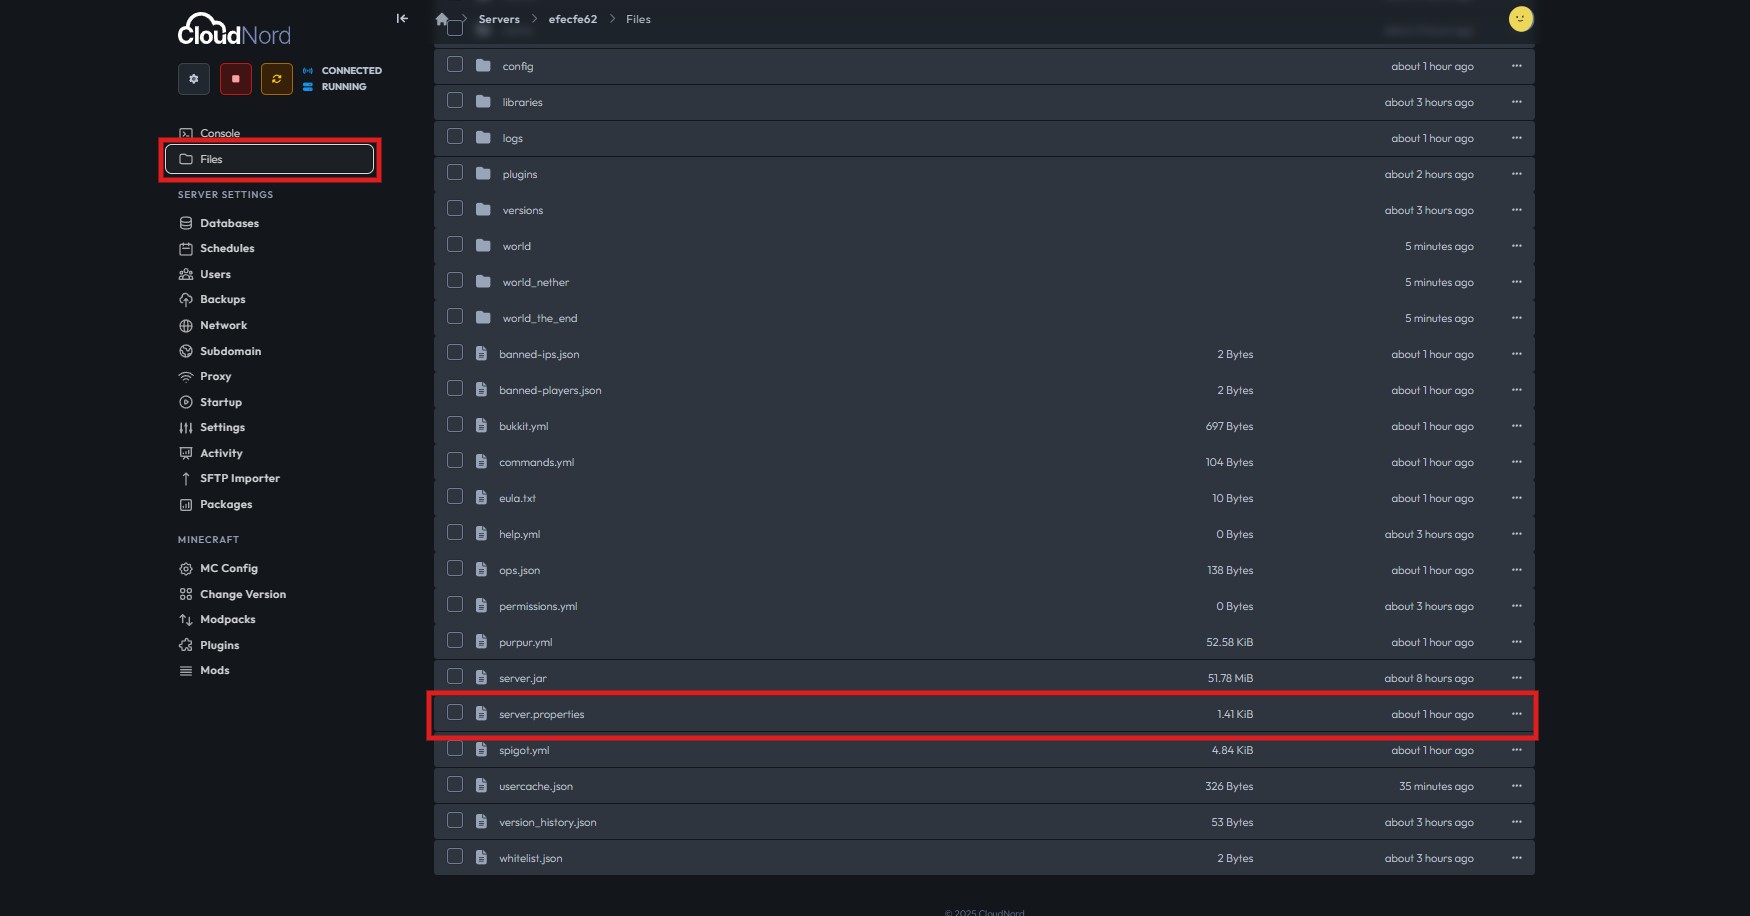
Access Server Files
-
Log in to your CloudNord Game Server Panel.
-
Navigate to the Files tab.
-
-
Edit
server.properties-
Locate the `
server.properties`file in the root directory of your server. -
Open the file for editing.
-
Add the Resource Pack Link
    `resource-pack=https://mc-packs.net/path-to-your-resourcepack.zip`

Optional: Add SHA-1 Hash for Integrity
-
Generate the SHA-1 hash of your
.zipfile using an online tool or command-line utility. -
Add the hash to the
server.propertiesfile for extra security:
    `resource-pack-sha1=your_sha1_hash_here`


Save the File
-
Save the changes and upload the modified
server.propertiesback to the server if edited locally.
Step 4: Restart Your Server
-
Click the Restart button in your CloudNord Panel to apply the new settings.
Step 5: Connect and Verify
-
Launch Minecraft and connect to your server.
-
Upon joining, you should be prompted to download the resource pack.
-
Verify that all textures, sounds, and assets are working correctly.
Troubleshooting Tips
-
Direct Link Issues: Make sure the link is publicly accessible and points directly to the
.zipfile. -
Compatibility: Ensure the resource pack matches your server version.
-
File Integrity: Check that the
.zipfile is not corrupted and has the correct folder structure.
With these steps, you can successfully upload and use resource packs on your CloudNord Minecraft server, creating a more immersive and visually engaging experience for you and your players.
Explore ready-to-use resource packs at: MC Packs
Need More Help?
If you can't find what you're looking for, our support team is here to help.![]()