How to Add Admins to Your Valheim Server on CloudNord
1. Get the SteamID64 of the Player
-
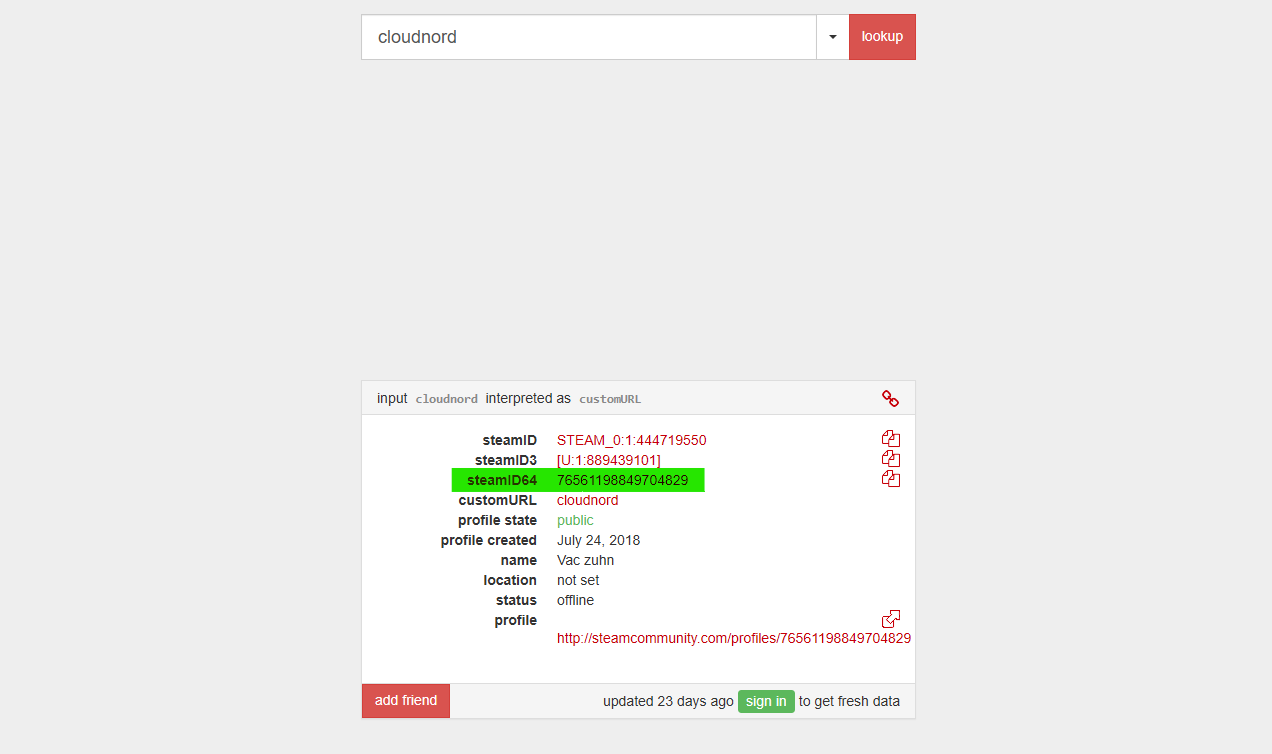
Visit steamid.io to convert a player’s custom Steam URL, SteamID, or other identifier into their SteamID64.
-
Enter the player’s name or URL, and copy the resulting 64-bit numeric SteamID64.
-
You’ll need this ID for the admin list.
2. Access Your Server’s Files
-
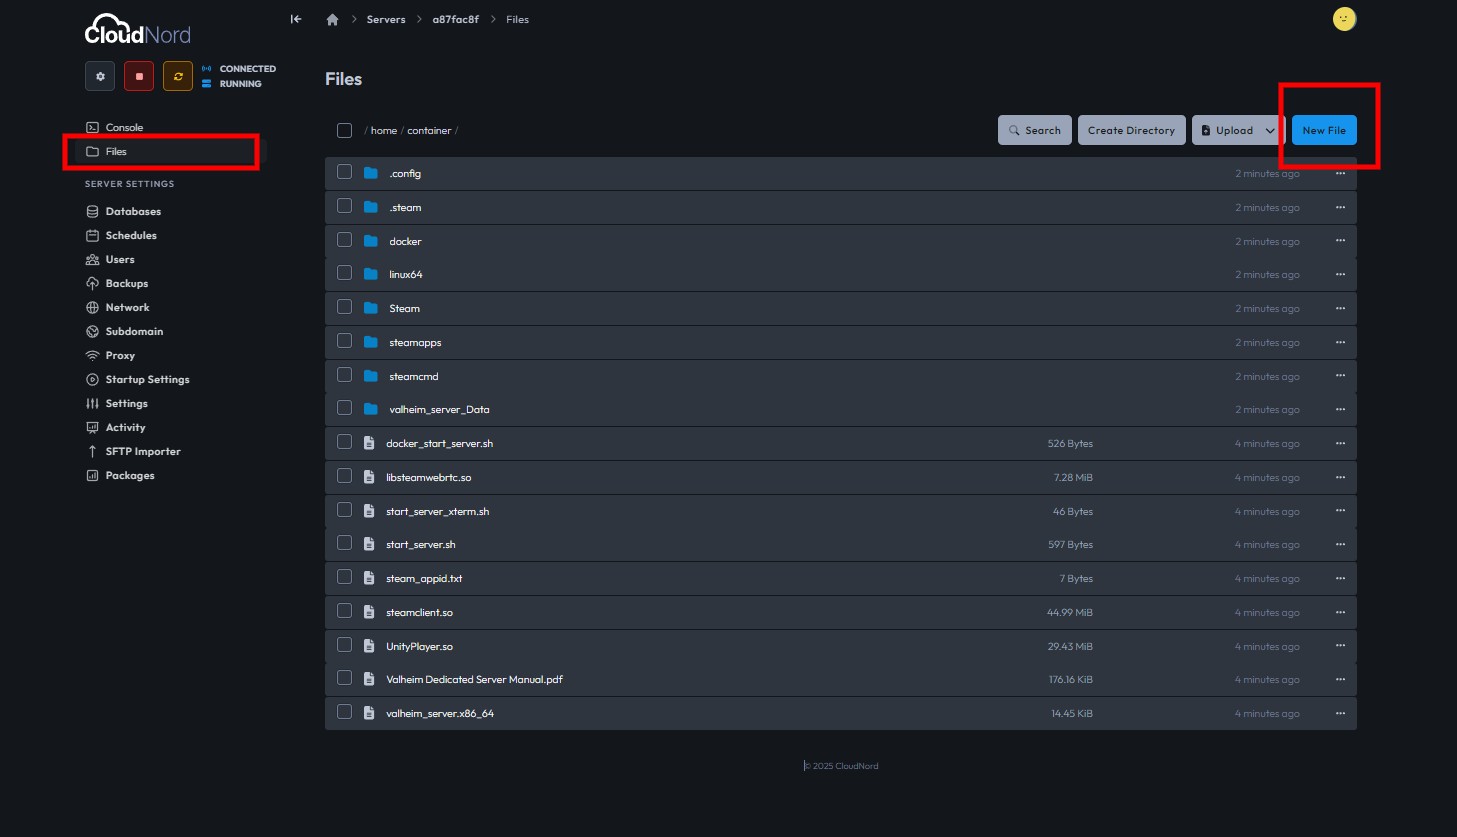
Log in to CloudNord and go to Servers from the left menu.
-
Select your Valheim server from the server list.
-
Click on Files in the sidebar to open the server’s file manager.
3. Create or Edit adminlist.txt
-
In the file manager, click the New File button to create a new file.
-
Paste the list of SteamID64s—each on a separate line.
Example:76561198123456789
76561198098765432
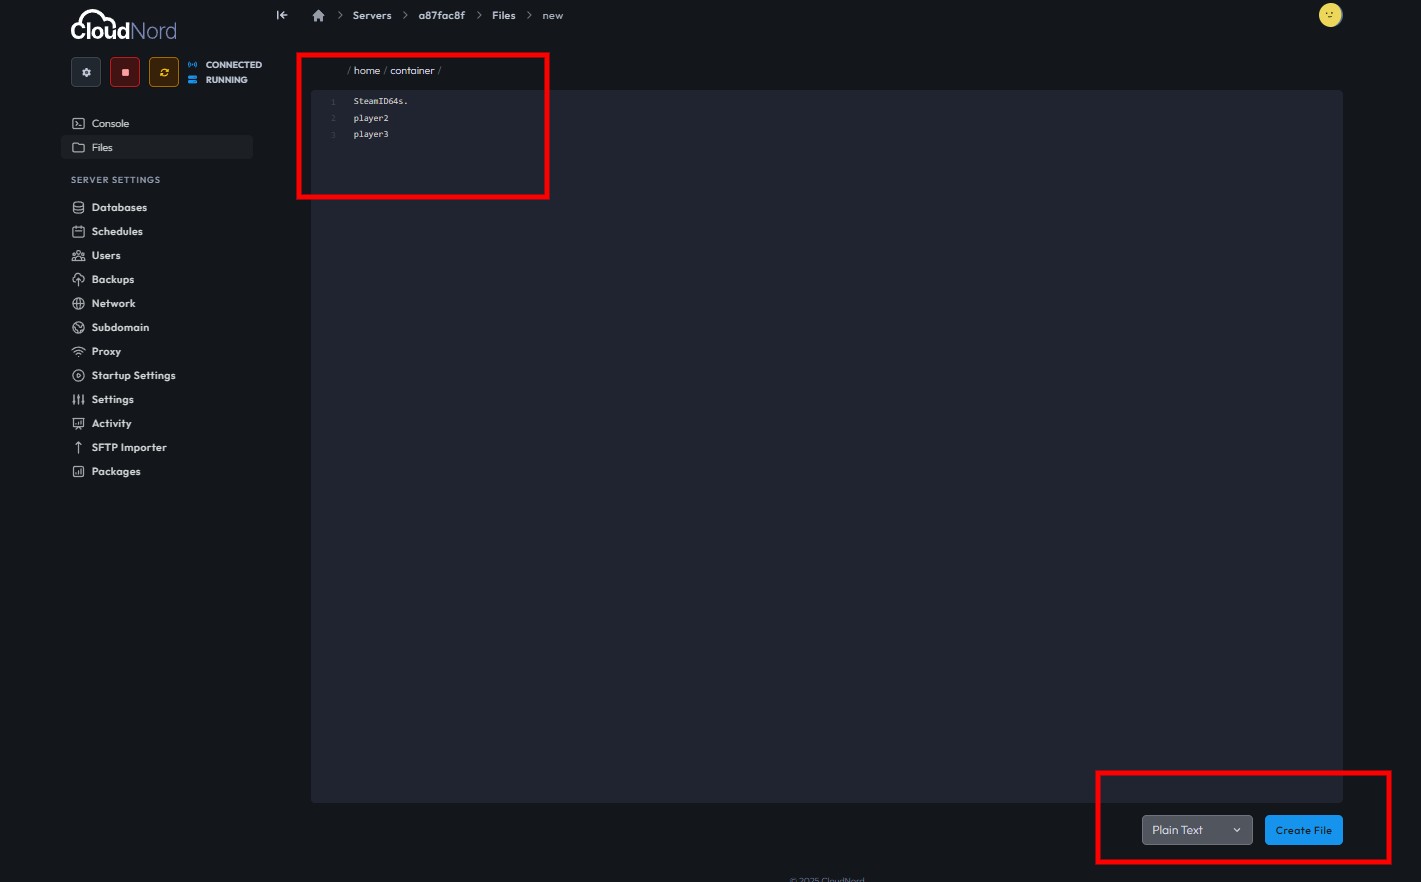
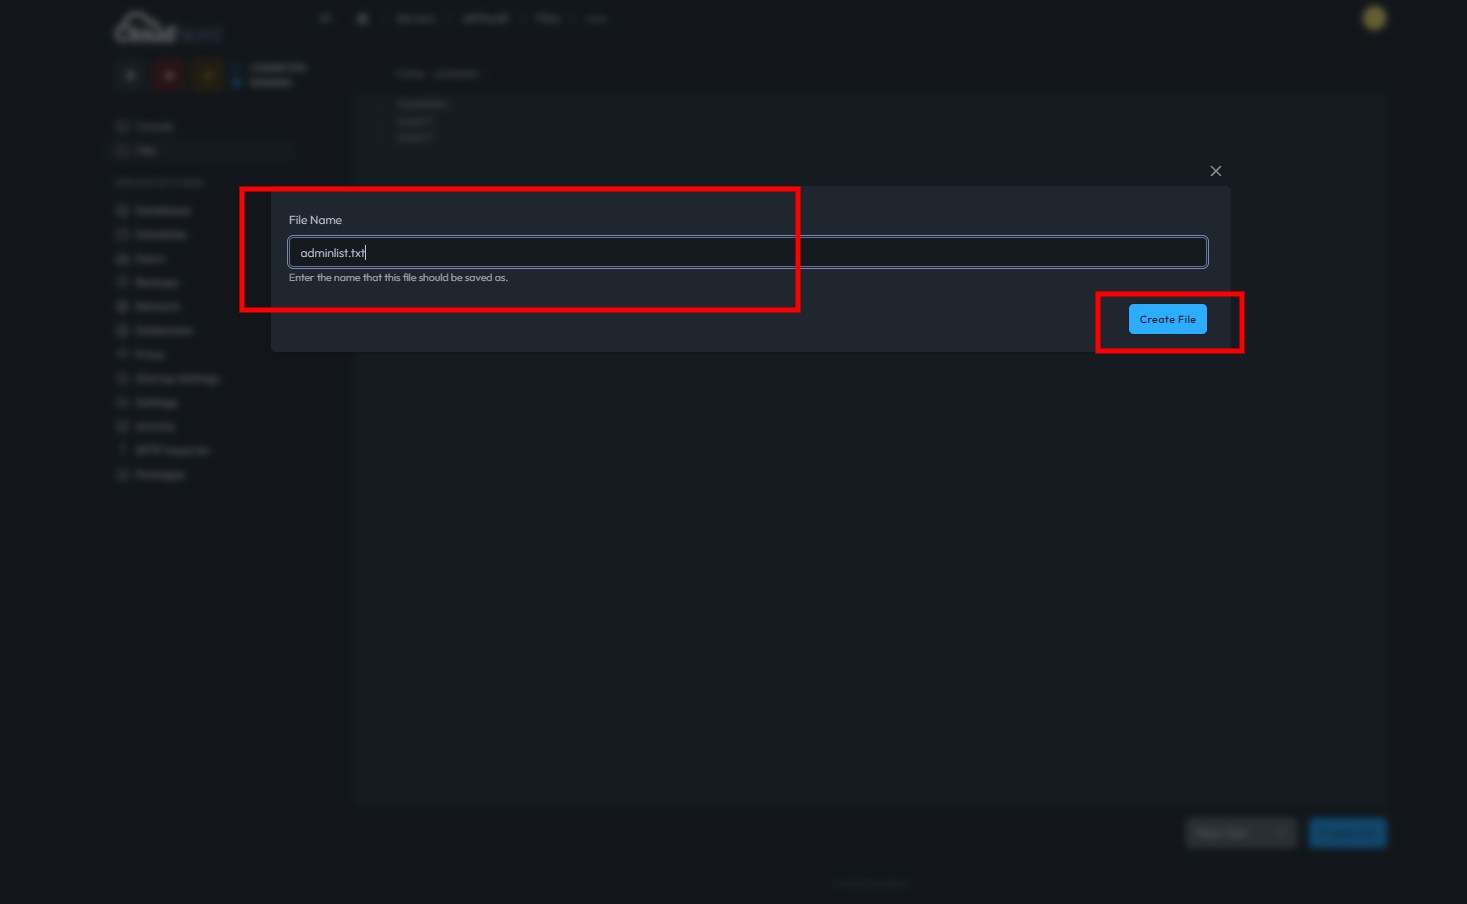
- After adding all admin SteamIDs, name your file adminlist.txt and click Create File to finish saving.
4. Verify and Activate Admins
-
The adminlist.txt file should now exist in your server’s root directory. When your server restarts or reloads, Valheim recognizes these SteamIDs as admins.
-
New admins will have access to admin commands the next time they connect.
Tips
-
Use steamid.io to reliably convert usernames to SteamID64 format for Valheim.
-
Admins gain access to special commands to manage the server and enforce rules.
-
Double-check SteamIDs for accuracy to prevent errors.
Need More Help?
If you can't find what you're looking for, our support team is here to help.
Riktiga ingenjörer, genomsnittlig svarstid under 15 minuter.